I have the recipe(s) for making whoopie(s)...

Thursday, January 9, 2014

Christmas 2013 Baking. The 12-14 Hour Marathon at the Les Bois Sucre! Devil Food Cake, Cannoli Filling with Ganache From Scratch


  The same recipe from my Cindy Birthday Cake I used to bake a Christmas cake. Instead of using the cupcake mold that was deep and would take a long time to bake/cool and etc. I decided to try my Giant Cookie pans instead. 
Medium size chocolate cake and Whoopie Pies
Giant Chocolate Cake with Ganache 
  This is the second time that I baked a cake from scratch. This time I used the giant cookie pan  and I decided to double the recipe to make sure that I had enough. The truth is that you do not need to double the cake recipe! I was able to make six whoopie pies, medium sized cake and a giant cake. What you do need to do is quadruple the ganache recipe so that you can have a thick layer of ganache! I have provided the ganache recipe quadrupled for convenience but left the cake recipe enough for two 9 inch pans.

  The Giant Cookie pan helped me save time which is important because the night before Christmas I put in a 12-14 hour marathon baking into 2 am in the morning. I was so tired on Christmas! Using the Giant Cookie pan is quicker time to bake the cake and you do not need to cut the cake to layer the cake because it is already thin.

  Buttermilk is very expensive if you do not have extra money for the Buttermilk you can use another substitute for Buttermilk instead.

FAUX BUTTER MILK:

Ingredients:


   Milk (just under one cup)
   1 Tablespoon white vinegar or lemon juice
1. Place a Tablespoon of white vinegar or lemon juice in a liquid measuring cup. I prefer lemon juice. Since I already used lemon zest in the cannoli recipe I could use fresh lemon juice from those lemons. 
2. Add enough milk to bring the liquid up to the one-cup line.
3. Let stand for five minute then you can use in the recipe. 


The ingredients
Devil's Food Cake 
(recipe I got from William Sonoma's Collection:Cake page 100)


Ingredients:

Makes 2 9-inch (23 cm) round cakes

2.25 cups (9 oz) cake (soft-wheat) flour
1 teaspoon baking soda (bicarbonate of soda)
0.25 teaspoon salt
1 cup (8 oz/250 g) unsalted butter, at room temperature
1 cup (7 oz/220 g) firmly packed light brown sugar
0.75 (6 oz/185 g) granulated sugar
4 large eggs, at room temperature
2 teaspoons vanilla extract (essence)
4 oz (125 g) unsweetened chocolate, chopped and melted (page 40)
1 cup (8 fl oz/250 mil) low-fat or nonfat Buttermilk, at room temperature

1.) The cookbook suggests buttering the two 9 inch pans. But I decided to do the cake in two giant cookie pans and instead of butter I used Pam's Baking spray with flour. The book suggests preheating the oven to 350 degrees F. Bake the cakes for 15-20 mins rotating them in Giant Cookie pan.

Giant Cookie Pan From Wilton


2.) Lightly tap the rim of  a fine-mesh sieve over a small bowl while adding the flour, baking soda, and salt. Set aside.


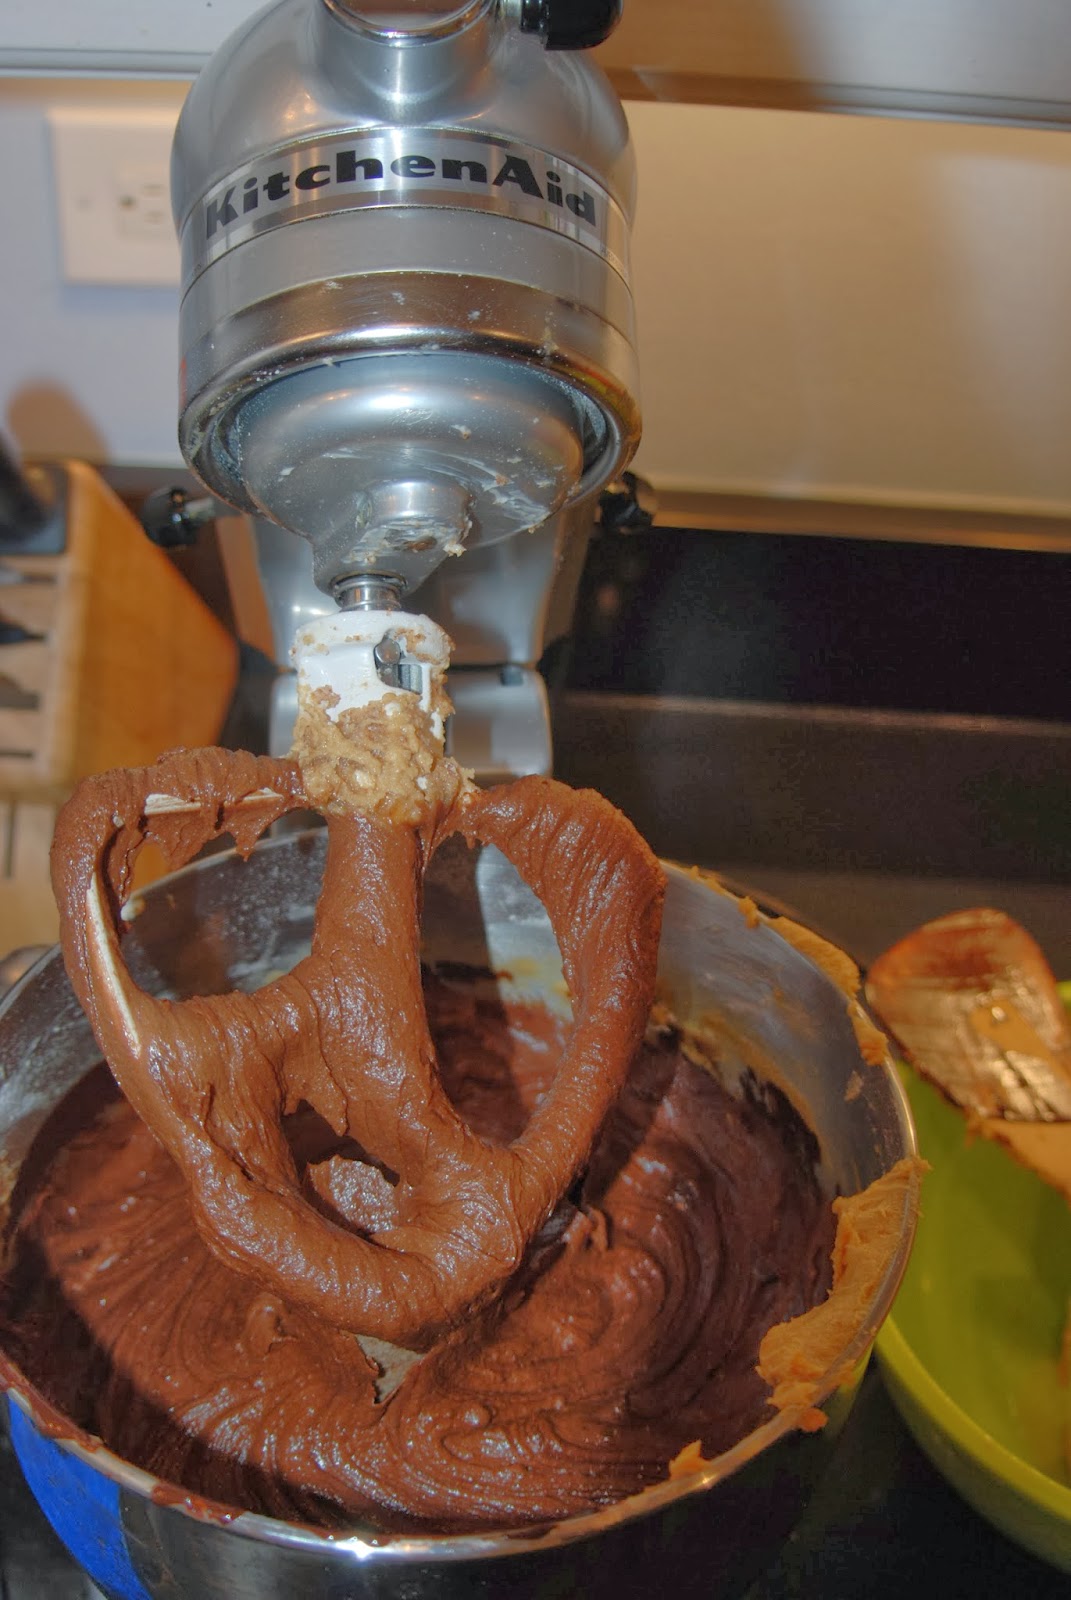
3.) Using the paddle attachment in a stand mixer combine the butter and the sugar (aka creaming the butter) . Beat on medium speed until the mixture is light and airy and lightens in color (refer to page 38 about creaming the butter if you have more questions).


4.) Add the eggs one at a time and beat on medium for one minute after each addition. Occasionally stop/scrape down the mixer.  


5.) After all of the eggs have been added add the vanilla extract and beat for 1 minute longer.


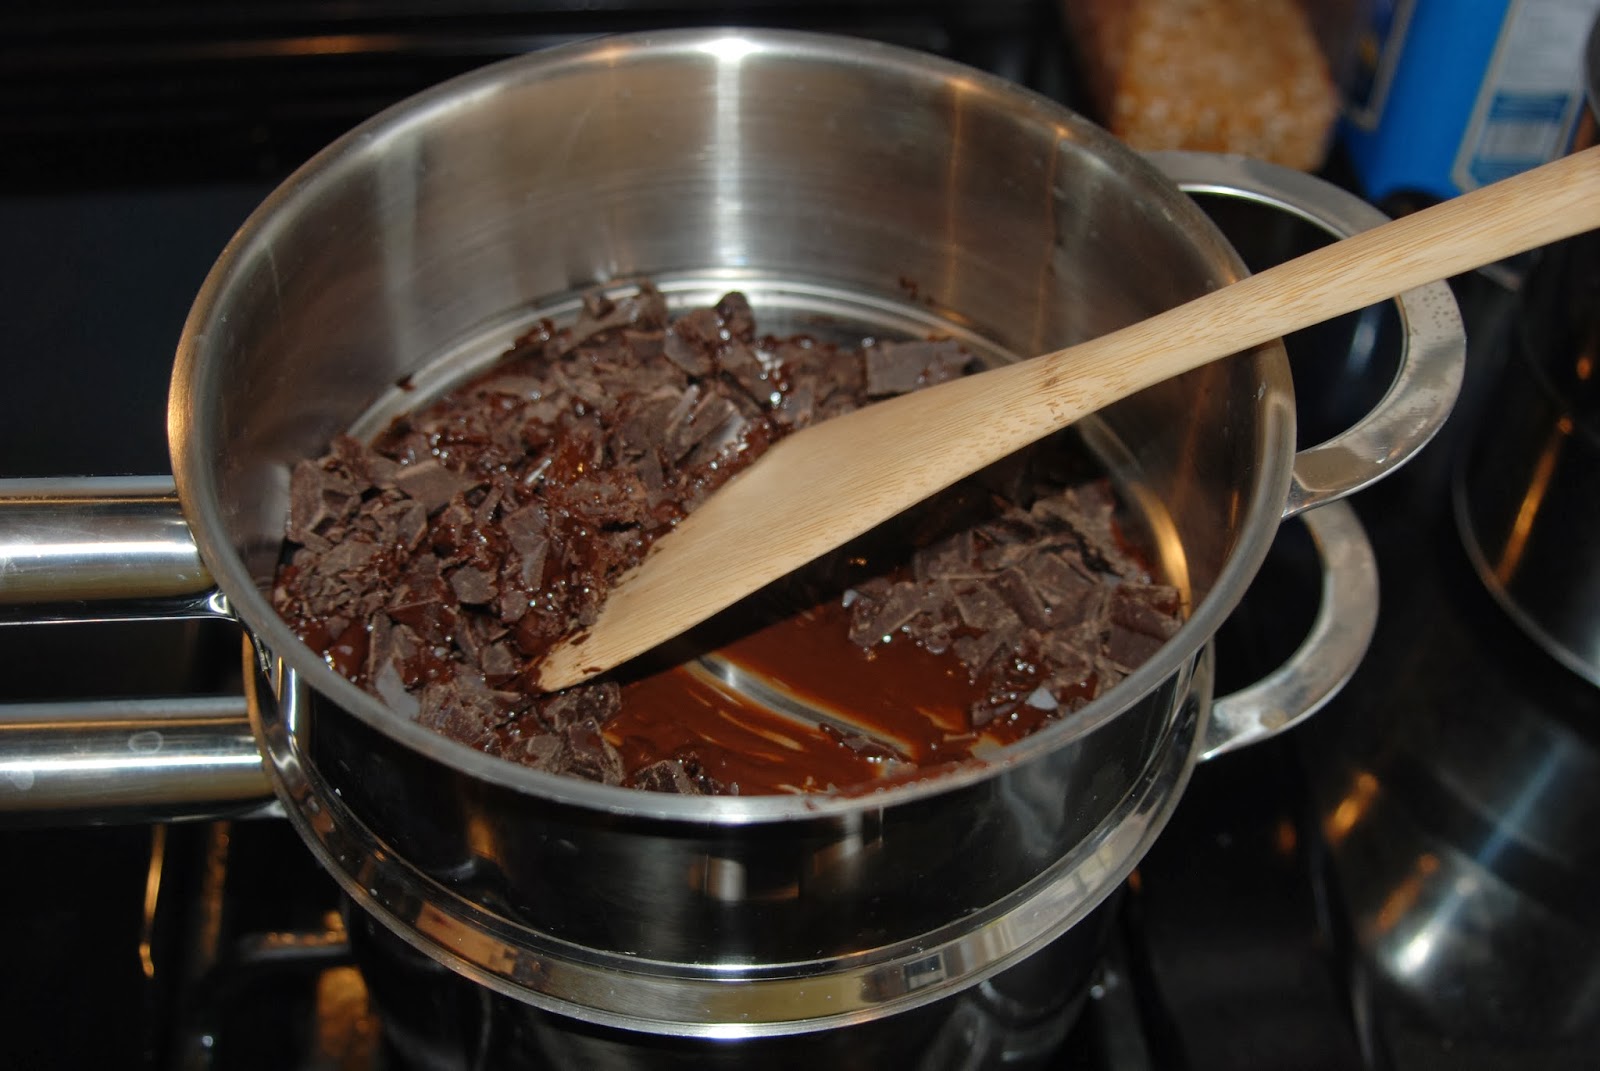
6.) Put the batter to the side and melt the chocolate over the double boiler on medium to low. Be careful not to burn the chocolate. Takes about 2 to 5 minutes after the water boils and make sure to stir it until it all melts.


7.) Add the melted chocolate to the batter and beat the mixture on medium speed until the batter is uniform in color. 


8.) Reduce the mixer to low. Add the dry ingredients in 3 batches alternatively with the buttermilk so that you begin and end with the dry ingredients. Before adding the ingredients make sure to well incorporate the batter before adding the alternative ingredient. 


9.) Pour the batter into the Giant Cookie pan and smooth the top with a spatula. Bake for 15-20 minutes (I would test with  tooth pick at 15 minute then evaluate. If it comes out dry it is ready. If it is wet or comes out with crumbs continue to bake until the cakes come out dry). 


10.) Let cool in the pan for 15 minutes then let cool. 


11.) Then run a thin knife carefully along the inside edge of the pan. Invert a wire rack on top of the cake and invert the cake pan. Lift off the pan it should slide out nicely. Let cool at least 45 minutes. This cake after being cooled it can be stored in plastic wrap and stored at room temperature for up to 2 days.

12.) Next make the Coffee Syrup:


Coffee Syrup (page 110 in William Sonoma's Collection:Cake book but this has been quadrupled)

1 cup /8 fl oz ml water
1 cup /8 fl oz granulated sugar
2 tablespoon instant coffee powder


1.) In a small saucepan stir together the water and the granulate sugar over low heat until the sugar dissolves and the mixture is hot.


2.) Stir in instant coffee powder and let cool.


13.) Brush the coffee syrup onto both sides of the pieces of cake with a pastry brush. I suggest getting a jelly roll pan line it with parchment paper and then put the cooling rack on top of it. I got two from Sur la Table that were a jelly roll and cooling rack set on sale

14.) Put the cake aside to make the Cannoli Filling. Hopefully you drained the ricotta cheese overnight as it says in the following recipes.

 I used grated lemons instead of orange for a more subtle taste. I used mini chocolate chips and I felt that the cannoli filling needed more chocolate bits!

Martha Stewart's Classic Cannoli Filling
Copyright of Marthastewart.com

Ingredients: 

2 3/4 cups (22 ounces) fresh ricotta cheese
3/4 cup confectioners' sugar
3 tablespoons mini semisweet chocolate chips
3/4 teaspoon pure vanilla extract
3/4 teaspoon finely grated orange zest
1/4 teaspoon fresh lemon juice

  1.  Line a sieve with a layer of cheesecloth, and set over a bowl. Spoon ricotta into sieve. Cover, and let drain in the refrigerator overnight.
  2. With an electric mixer on medium speed, beat ricotta and confectioners' sugar until fluffy. Beat in chocolate chips, vanilla, zest, and lemon juice. Cover with plastic wrap, and refrigerate.
Cindy's Cupcake Cake Cannoli Filling (based on the Cannoli Filing by Martha Stewart)


Ingredients: 

2.75 cups (22 ounces) fresh ricotta cheese
0.75 cup confectioners' sugar
2 cups mini chocolate morsels
0.75 teaspoon pure vanilla extract
0.75 teaspoon finely grated lemons (about 4 or 5 lemons)
0.25 teaspoon fresh lemon juice

  1. Spoon ricotta over a sieve and drain overnight ( or 4 to 8 hours) over a bowl. Cover with plastic wrap.
  2. Using Stand mixer on medium speed, beat ricotta and confectioners' sugar until fluffy. Then beat in each item: chocolate/chocolate chips, vanilla, zest and then lemon juice. Cover with plastic wrap and refrigerate at least one hour so that it can firm.
15.) When the Cannoli filling is cooled assemble the cake back together layer the filling. I would suggest putting it on a cookie sheet that is lined with parchment paper. Then put the cooling rack over the lined cookie sheet and put the cake on top of that cooling rack. Put a layer of cannoli filling between the two cakes.

16.) Put the cake aside and chill in the fridge. Make the Chocolate Ganache

Part of the supplies from my 12-14 hour baking marathon.
Hershey Baking Melts are perfect for the ganache
as you will not have to chop up the chocolate.
Chocolate Ganache (page 28 & 29 in William Sonoma's Collection:Cake book)

24 oz semisweet (plain) Hershey Baking Melts Milk Chocolate
8 tablespoons/ 1 stick unsalted butter
10 oz / heavy cream (plus more as needed to adjust the consistency)
4 teaspoon vanilla extract (essence)

1.) Chop the chocolate into small pieces so that they will melt quickly without burning. Make sure when you chop the chocolate not to touch it with your hands otherwise the chocolate will melt on your hands. Set the chocolate aside.

2.) Heat the butter and cream. Cut the butter into 8 equal pieces. In a heavy saucepan on medium-low heat combine the cream and the butter. Heat until the butter is melted and tiny bubbles have formed along the side of the pan which takes about 2 minutes. The mixture should be 160 F on an instant read thermometer. Do not allow the mixture to boil or it will scorch and give the finished ganache a burned tastes.


3.) Remove the pan from the heat and immediately add the chopped chocolate. Let the chocolate sit in the hot cream mixture for about 30 seconds to soften.

4.) Add the vanilla extract to the chocolate-cream mixture. Using the whisk, blend the mixture in a circular motion until all the chocolate is melted and the mixture is smooth.


5.) At this point, the mixture will be smooth and pourable. I waited 1 hours for it to cool in the fridge and it was still like a thick glaze for the whole cake. Then I put it in the freezer for 20 minutes and it was finally the consistency of frosting. I frosted the cake on the platter then I did not wrap the cake so that it could firm up. When I woke up a couple of hours later I wrapped the cake and it had a lovely hard shell. It needed to have more frosting and next time I will quadruple the recipe.  I only doubled the recipe and there was not enough really to frost the cake. 


Thursday, January 2, 2014

Ugly Sofa Curtains inspires new linens


  The Results are in and: THE SHADES ARE AMAZING!

  It took a while for Ugly Sofa to deliver my Roman Shades. Ugly Sofa says that they X out all of the curtain tags/boxes so that you cannot return them to the Pottery Barn Teen store. However they did not X out anything on my packages! I could have given them as a gift and no one would have known except for the fact they are 63 inches long instead of 64 inches long. Since my windows do not depend on it being 64 inches long it is okay! They arrived as if I purchased them off of Pottery Barn and paid a crazy amount of money.

  I bought my Curtains the weekend after Thanksgiving and I had to wait a long time! In fact I had to contact them via email for them to send out the curtains. But they came perfectly and after a week or so I should have contacted them. So that is the only draw back but I think they are pretty much a mom and pop store. I still could not beat the savings on the curtains!

These is the Grosgrain  ribbon shade from Pottery Barn that you will pay
$239 more if you buy at Pottery Barn rather than Ugly Sofa.
That is a lot of money for black out lining!
  The Shades are not black out lined but my bedroom is on the side of the condo that does not get a lot of sun so it is actually perfect. At the price of $29.98 including shipping, the 20% off coupon and price of two Roman Shades-- I think that was a great deal! In fact I just put one of the window shades I was going to put up (but never did and are still good) on eBay and I purchased another one of these shades because I love them! Also it is much cheaper and I did not like the other one that much especially for the price! I really just wanted to purchase these on Pottery Barn but they are crazy expensive I could not even afford one of them! The grosgrain ribbon shades are $249 plus 10% of the final price is the shipping charge at Pottery Barn!


My shelves are up with some items!

 My Bedroom is slowly coming together but as I said my husband had gone away on vacation was home a couple of days and then went in for Gallbladder surgery. Three days ago the last part of Silicone was added to the shelves and the room is starting to take shape. Slowly I am cleaning out the living room, getting rid of Christmas decoration and organizing the bedroom. There are still paint touch ups and some removal of items to go into our storage unit. I still need to do a lot of organizing but it is coming along!

  I also purchased a new duvet cover, a couple Euro shams, a couple standard pillow covers and some personalized pillows from West Elm. They were 20% off and today I woke up and there was free shipping. I called West Elm and since I ordered last night they gave me the free shipping and are going to reimburse me the shipping! It never hurts to call customer service if you buy an item and the next day it goes on sale or there is an offer of free shipping.


   I already have purchased the West Elm Duvet in Feather Gray Stripe in size King for one of my comforters but I just bought one in size queen for the other comforters that I have. I have another set of duvets for the spring/summer but it never hurts to have change of duvets so you do not have to dry clean your comforters as much.


    I wanted back up for the personalized Feather Gray Stripe Euro Sham. I got two of the Euro shams personalized with my dog Penny's name in Citron.


   I wanted back up for the personalized Feather Gray Stripe so I got two of the Standard shams personalized one with my name and one with my husband's name in Citron.


  I do not have a lot of Euro Shams for my Euro pillow so I wanted to get variety for the bed. These Sol Stripe in Golden Gate were such a steal at West Elm and were the right colors so I purchased them.


  Then I got four of the regular Shams in Sol Stripe in Golden Gate so that it would be able to mix and match the duvet with the different shams for variety.


  I really wanted to get this sheet set with extra standard pillows and personalize them but I think for on sale $70.00 for a sheet set plus another sham set at $22 for a total of $92 was pretty steep price. The sheet set is so cute and I love to be able to monogram! I think am either going to wait for a better sale price or to see if i could get something like it at Home Goods. I think I could probably get this set like this for $45 at Home Goods or I will shop for another sheet set that might be better.

  The sheet set is only 200 count so it is not like it is Egyptian cotton with a high thread count. I am also wondering if it would be too much with all of the wide stripes in the duvet etc. I had already spend a great deal of money last night so I did not want to spend anymore. Luckily I am selling some items on eBay so that should counter act my spending on these linens. But sometimes you need fresh linens to perk up a place!

 West Elm Stylist also suggests using white cotton linens for the base so you have a place to rest your eyes. How do you layer your bed?

Thursday, December 26, 2013

How to Decorate your Christmas Tree for Less!

 
The Ornaments I bought for myself this year!

   I love Hallmark Ornaments but I never can afford to purchase them for full price! So I have a tradition that started because of my horseback riding instructor/friend loved Hallmark Ornaments. She goes every year after Christmas and she purchases Hallmark Ornaments.I have gone a couple of years when I have had extra money.  I go to the Hallmark stores/Gold Crown Stores and I arrive at opening time so I can have first pick. I am lucky to be right across from the Hallmark Gold Store so it just requires me getting up early and having some spare money. Then I purchase the Hallmark Ornaments that I want for half the ticket price. I was alone at 8:00 am but at 8:10 am people were flooding in. A couple days before Xmas I looked over the ornaments to see where the ornaments I wanted were and then I made a plan of attack.

   I have a Hallmark Gold Store card so I earn coupons now for the purchase so that leads to more of the discount. I wanted to have the card last year but they were out of them and they never arrived in time. I did not spend that much on ornaments this year but since I got some money for Xmas I spent $101.00 on ornaments more than half of them I am selling on Ebay.

Penny as a little pup and the mini live Christmas Tree!

The first year we were married we did not get a tree. The next year we got a live mini Christmas tree and did not decorate it because of the fact Penny was a puppy. The live mini Xmas tree died before we could replant it so we considered that a waste.

Christmas tree 2012 with limited amount of Ornaments with Penny

2012 Christmas tree without presents or Penny.

2012 Christmas Tree Topper.
It was an Ornament I got for Christmas 2008!

Last year I mostly got dog photo ornaments
because we adore Penny!I got the ornament years that
she was here with us for a pretty good deal!
  Last year was the first year that I bought a tree. I went across to Michaels with a good coupon/sale and I purchased a  fake small tree because I live in a 600 square foot condo. Last year I went eBay hunting because a lot of my hallmark ornaments and ornaments were ruined.  After Christmas in 2012 I restarted the tradition of going after Christmas to get Hallmark Christmas ornaments. I have sold some of those that I purchased on eBay and the duplicates I saved for myself. I also got a lot of ornaments from eBay for crazy deals. This year there was a flood in our storage unit. The outside of the Christmas tree box got soaked but I was lucky that I did not have to buy another Xmas tree. It was not wet when I touched the Christmas tree but I made sure that it was dried before I plugged in the tree. It works and it now is stored away in its Christmas bag in the condo.


Burke Decor Bag I got for $2.50 I got four and one is for Ornaments!

My Ornament bag and I also have one for my Christmas tree!

 Ways to save on decorating a tree:

  •  Buy after the season. 
  •  Use cheap wide bendable ribbon to wrap the tree gaps (you can save even more by buying after Christmas).
On long roll of Bendable Red with Silver ribbon I got from
Michaels for $5 and I reuse it every year! It makes it look luxe for less!

  •  Use a cheap piece of faux fur to wrap the bottom of the tree instead of a tree skirt (I use one that I bought from Joann's fabric years ago for a couple of dollars as a tree skirt).
I bought the ornament on eBay and
that is the faux fur piece of fabric I use as a tree skirt.

  •  Use eBay to find the ornaments that you want for a deal. You can get great deals on New in box items! But save even more on used items if you don't mind if they are out of the box. You can use the price range option on the left hand side to narrow your search and pay only as much as you want for items. If you don't want to bid you can also use the buy it now option to narrow your search to only those that are buy it now. 
I bought these on eBay for a steal!
Also notice the bendable ribbon I got for a steal I use to wrap the tree!

  • I also do not have a topper I like to use a big ribbon and use an ornament that I like as the topper. 

Pictures of my tree this year

My 2013 Tree with the lights off but the tree lights on.
The Faux Fur as the tree skirt works!

The purchases I got post Xmas last year and from Ebay

I got this 1994 ornament for the pictures of my
dog for $3 including shipping last year!

I got both the bride and groom on ebay for $7 last year on eBay

I got these both on eBay as well for a steal!

I found this hard to find "A Christmas Story:
Double Dog you" for a good price too!

I was unable to get this 1st Xmas Ornament
for our first  Xmas but I got it last year for our 4th!
Thanks eBay and it was cheap!

More Ebay cheap Ornaments!

I got that Santa and Dog ornament for free with my Ebay bucks! 

Those are two of my new ornaments from last year!

A Christmas Story turned 30 this year!
This is the Old Man that I got on Ebay.

My favorite it is not Hallmark but it is "The Pink Nightmare" ornament!


        Happy 30th Birthday A Christmas Story!

"The Pink Nightmare" scene from A Christmas Story

Thursday, December 19, 2013

Pottery Barn's Holman Shelves A Review


Pottery Barn Holman Shelves

   Holman Shelves from Pottery Barn are not in the Pottery Barn store. You can see a one foot or the Holman entertaining shelves examples in the stores. The reason this is because they are not an easy shelf to put up. If they had them in the store then you would see how they really don't meet up! There is a reason that they are only shown in the picture above from far away!

   I chose to get them in modern white. I got 4 four foot shelves, 2 corner shelves and 6 three foot shelves. I got them 15% off but I had to pay for them to be shipped which was 10% of my order total. I paid close to $1,000 for shelves, $300 for install, plus caulk and new plaster hardware for the shelves. If I knew that my husband's friend would be available I probably could have gotten the shelves up for less! I have to say that they are well crafted but they are not designed to come apart for a more custom fit. I also have plaster walls which makes the hardware included obsolete. Do not even buy the corner shelves because they are only for a perfect 90 degree corner which no wall is! You have to ruin the corner shelf to have it go onto the wall!

Jet Stream Paint from Benjamin Moore


 Against the Jet Stream paint color from Benjamin Moore they pop well! But if you want to connect them and especially the corner shelf you are not going to be able to easily get them on the wall. We had to hire my husband's friend to put up the shelves. It took four visits to get all the shelves up because it was so frustrating for the carpenter/handy man! He was talking about California closet how they basically have the same brackets to put up the shelves. The only issue is that Pottery Barn has the system based on a perfect wall (which no wall is) and the cleat system does not have a generous lip. The California Closet System according to my husband's friend is easy and is based on the same concept of the Holman Shelves. The exception where the Holman Shelving system fails is that it does not understands that the wall is not perfectly square.

The gaps go towards the front on the wall of the dressers

   The result is it was a pain to put up the shelves because the shelf could not go on the cleat system because walls bend. In order to get the shelf on the wall the bracket had to be loose but if the bracket was loose then the shelf would not go over the bracket. This caused my husband's friend to go mad and he had to leave a couple times just to get his cool back! Also it caused gaps on the walls. I was also told that the gaps happen if you try to butt up ready made shelves across a long area of the wall. This was not because my husband's friend cannot put up shelves. But the fact that the shelves were pre-finished he could not cut them without ruining them! He had to cut the corner piece otherwise the shelves would not have fit together. This is because some walls bow in and others bow out. It happens with any kind of pre-fabbed joined together shelf. You cans see this in the pictures I have posted. 


A really big gap! This is because the way the wall bends!

This is two shelves not quite making it together perfectly!

From far away it does not looks so bad! Caulking the shelves for a seamless finish!


 If I knew that I would be able to customs shelves and that my husband's friend was available to create shelves I would have from the start. I have learned my lesson. I thought since I saw the video on pottery barn.  It would have been easier and we would have already been done with the room! But now we have to caulk the shelves and then paint the caulk on the shelves! 


 There are also really cute ideas for non tradition shelves like the plumbing pipe shelves with reclaimed wood.  Here is another example


Here is more what I was thinking of if you wanted a floating shelf. Use plumbing supplies to put reclaimed wood or wood over the shelves. 


   My advice do not buy the Holman shelves from Pottery barn if you plan to do what is shown above! Get a good carpenter to install custom shelves because you cannot fit pre-finished shelves. It is apparently a joke within the carpenters/handymen about pre-fabbed shelves that they never easily go up! If you want a custom shelving look don't go pre-fabbed!

 I am hoping that my bedroom will be finished before my husband goes into surgery!